Once the desired Data Quality Helper settings have been created, the default buttons for the settings’ objects will need to be updated to leverage the Data Quality Helper lightning component. Please Note: The DQH_Upsert Lightning Web Component does not support the Task and Event objects.
- Go into Setup (in the lightning experience)
- Search for and select the ‘Object Manager’
- Select the object that you have created a setting for.
- Select the ‘Buttons, Links, and Action’ section.
- Find the buttons you would like to override to leverage the Data Quality Helper functionality.
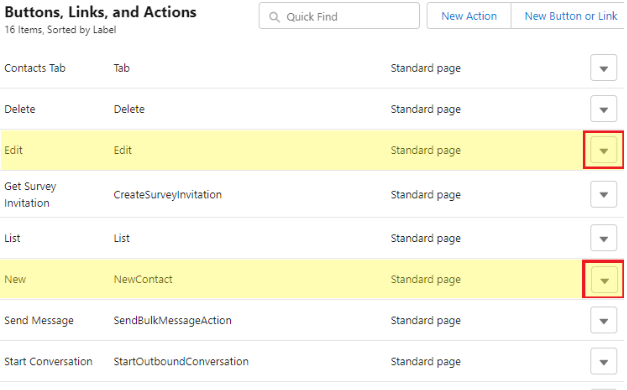
- If you would like to run the Data Quality Helper settings on creation of a record, select the dropdown menu to the right of the ‘New’ button and click ‘Edit’.
- If you would like to run the Data Quality Helper settings on edit of a record, select the dropdown menu to the right of the ‘Edit’ button and click ‘Edit’.
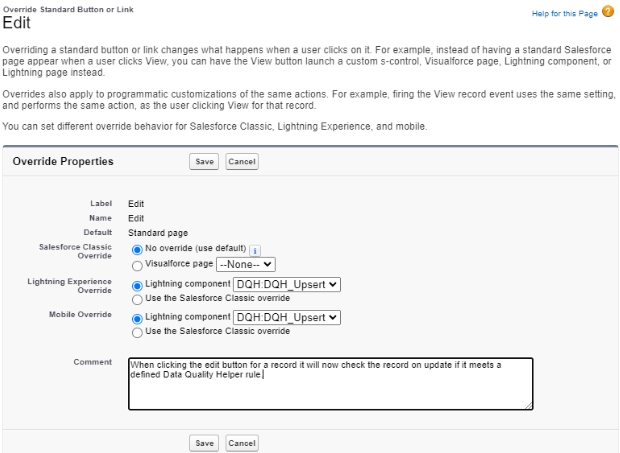
- Update both the ‘Lightning Experience Override’ and ‘Mobile Override’ sections to leverage the ‘DQH:DQH_Upsert’ Lightning Component. (see image below for an example)
- Repeat the above steps 3-6 for each object that a Data Quality Helper rule has been created for.
Enable functionality when viewing record detail pages
If you would like to display warning messages to users viewing the record detail page for a record that encounters Data Quality Helper validation/dupe warnings, you can follow the steps below to add the ‘Data Quality Helper Record Detail Info’ component to the lightning record page.
- Go into Setup (in the lightning experience).
- Search for and select the ‘Object Manager’.
- Select the object that you have created a setting for.
- Select the ‘Lightning Record Pages’ section.
- Edit your existing lightning record page or add a new one.
- If creating a new lightning record page, select what type of page, click ‘Next’, and populate the label for the layout and what object the layout belongs to, click ‘Next’, then select the page template you would like to use.
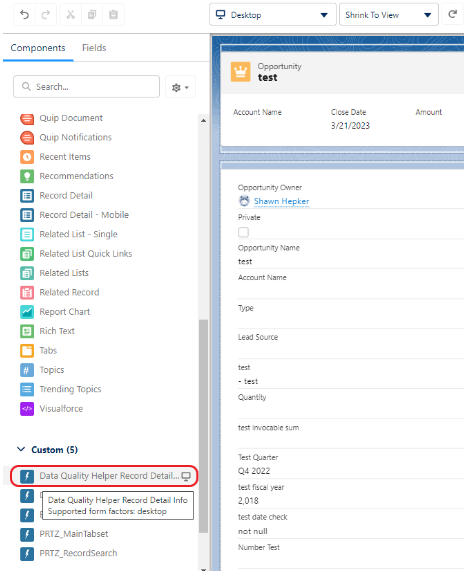
- Scroll down in the components section on the left hand side of the page to the ‘Custom - Managed’ component sub section.
- Click and drag the ‘Data Quality Helper Record Detail Info’ custom component to where you would like it to display on your detail page.
- If you would like to enable inline edit functionality, you may click the Data Quality Helper Record Detail Component once added to the page and check the ‘Allow Inline Edit’ checkbox in the component information section on the far right side. Please Note: If inline edit functionality is enabled, we suggest removing the standard record detail component from the page. If not removed, the details will display twice.
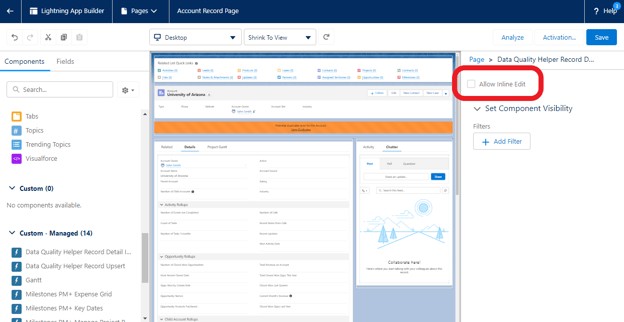
- Once the page looks good, ‘Save’ and activate the lightning record page.
View All Data Quality Issues
If you would like for users to see multiple records that have encountered data quality issues, you may follow the steps below to add the ‘Data Quality Helper Issues’ component to the home page layout.
- Go into Setup (in the lightning experience).
- Search for and select Lightning App Builder.
- Click ‘Edit’ next to the home page layout that you would like to modify. In most cases, it will be ‘Home Page Default’.
- Scroll down in the components section on the left hand side of the page to the ‘Custom - Managed’ component sub section.
- Click and drag the ‘Data Quality Helper Issues’ custom component to where you would like it to display on the home page.
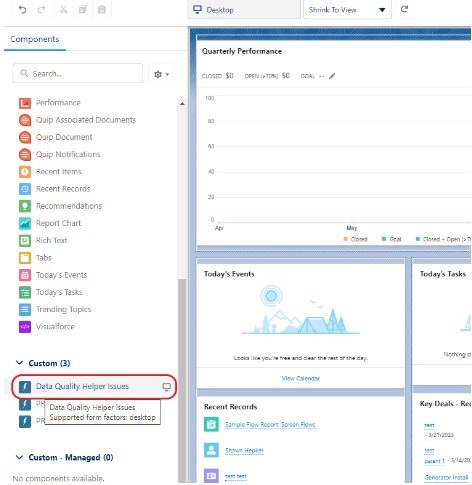
- Once the page looks good, ‘Save’ and activate the home page.
Please Note: If you have just created a duplicate or validation rule, you may have to log issues for the created rule. To do this, go to the ‘Data Quality Helper Configuration’ tab, select the rule type for the recently created rule, find the rule in the list then click the dropdown menu item in the far right column, then click the ‘Log Validation Issues’ or ‘Log Dupe Records’ menu item.