
Problem: Different teams are working on different objects within Salesforce, resulting in a lack of collaboration and visibility to valuable information.
For an organization to work effectively, it's important to know what the other teams are doing with a given account and how those things impact the relationship for that account.
Solution: Create a note overview display at the Account level.
For example, if a big sale is pending with a given account (Opportunity), the sales team may be unaware of issues that account is experiencing (Case). Alternatively the operations team may be unaware of the big sale that is pending. If each team is aware of the activity that’s happening across the different teams, then each team will be able to create a game plan of how to prioritize their efforts.
- If the sales team has knowledge of the issues the account is experiencing, they may be able to provide additional products to the customer to help them overcome the issue they are experiencing if those products are available.
- If the operations team is aware of the big sale that is pending, they may be able to prioritize their efforts to resolve the issue the account is experiencing to increase the likelihood of the sale.
How to Setup the Account Overview Configuration in Work Trail
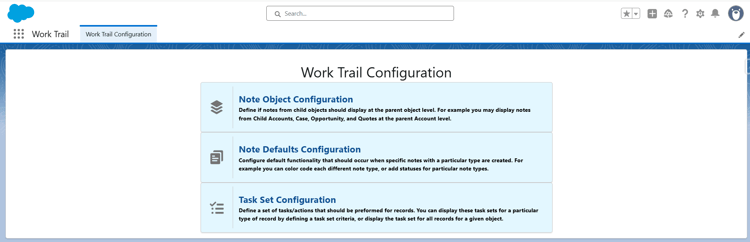
- Navigate to the Work Trail Configuration page.
- Click the ‘Note Object Configuration’ box.
- Click the ‘New’ button at the bottom right corner of the model.
- For the note overview object, select the ‘Account’ object.

- In the child object selection picklist select ‘Opportunity,’ ‘Case,’ ‘Contact,’ and any other standard or custom object that your teams work on or need to track information for.
- Once all the objects have been selected, click the ‘Save’ button.
- Then add the ‘Work Trail Notes And Tasks’ component to the page layout for the Account object and all of the child objects selected in step 5.
- Navigate to the object you’d like to add the component to.
- In the top right corner of the screen click the gear icon then click on ‘Edit Page.’
- On the left side bar, scroll down to the custom component section. Then click and drag the ‘Work Trail Notes and Tasks’ component to the desired destination on the page layout.
- Click the ‘Save’ button in the top right corner of the screen, and set it as the active page layout if you haven't already done so.
| Work Trail Use Case Library |